Getting Started
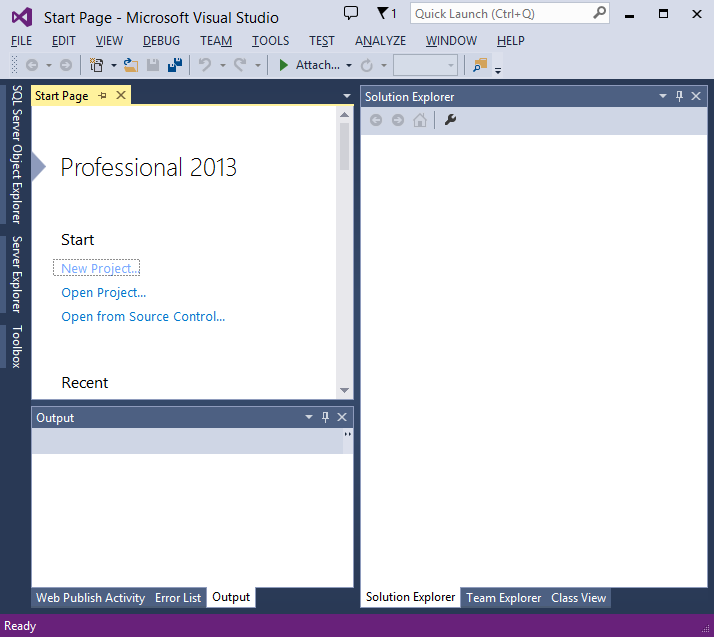
Start by installing and running Visual Studio Express 2013 for Web or Visual Studio 2013.
If you are using Visual Studio 2010 or Visual Studio 2012, then please refer to our
Help Tutorials about integrating jQWidgets with ASP .NET, ASP .NET MVC3 and ASP .NET MVC4
Visual Studio is an IDE, or integrated development environment. Just like you use Microsoft Word to write documents, you'll use an IDE to create applications. In Visual Studio there's a toolbar along the top showing various options available to you. There's also a menu that provides another way to perform tasks in the IDE. (For example, instead of selecting New Project from the Start page, you can use the menu and select File > New Project.)
Your First Application
Click New Project, then select Visual C# on the left, then Web and then select ASP.NET Web Application. Name your project and then click OK.
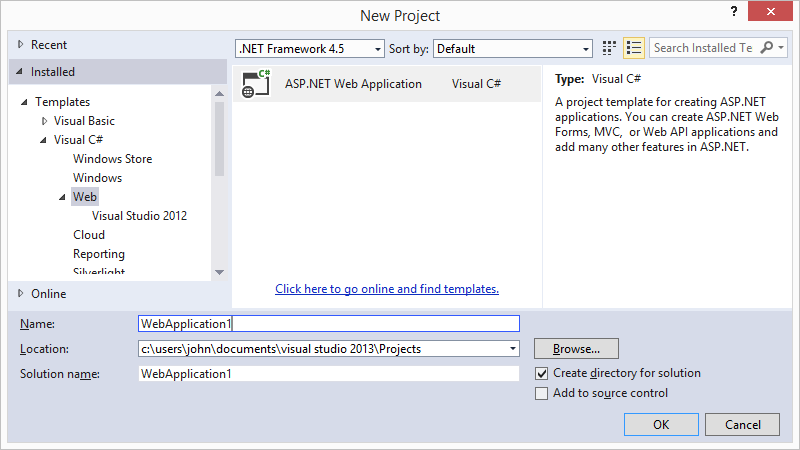
In the New ASP.NET Project dialog, click MVC and then click OK.

Visual Studio used a default template for the ASP.NET MVC project you just created, so you have a working application right now without doing anything! This is a simple "Hello World!" project, and it's a good place to start your application.
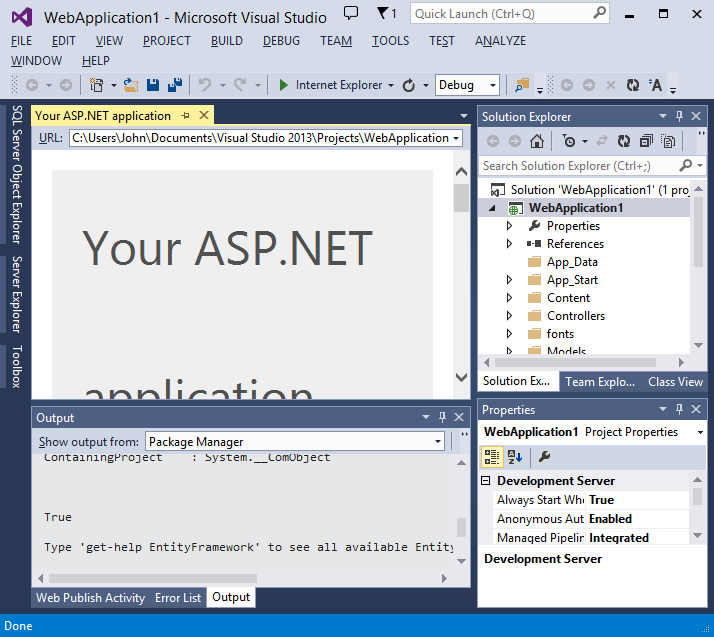
Click F5 to start debugging. F5 causes Visual Studio to start IIS Express and run your web app. Visual Studio then launches a browser and opens the application's home page. Notice that the address bar of the browser says localhost:port# and not something like example.com. That's because localhost always points to your own local computer, which in this case is running the application you just built. When Visual Studio runs a web project, a random port is used for the web server. In the image below, the port number is 4464. When you run the application, you'll see a different port number.
 Download jQWidgets
 and open the jqwidgets folder from the download package.
Copy the necessary for your application JavaScript files from the
jqwidgets and
jqwidgets/globalize folders and paste them to your project's
Scripts folder.

After that, open the
jqwidgets/styles folder from the download package, copy the necessary CSS files and paste them in your project's
Content folder. After that, copy and paste the images folder.

In the
Solution Explorer pane, open
App_Start/BundleConfig.cs and configure it to include the jQWidgets JavaScript and CSS files.
public class BundleConfig
{
    // For more information on bundling, visit http://go.microsoft.com/fwlink/?LinkId=301862
    public static void RegisterBundles(BundleCollection bundles)
    {
        bundles.Add(new ScriptBundle("~/bundles/jquery").Include(
                    "~/Scripts/jquery-{version}.js"));

        bundles.Add(new ScriptBundle("~/bundles/jqueryval").Include(
                    "~/Scripts/jquery.validate*"));

        // Use the development version of Modernizr to develop with and learn from. Then, when you're
        // ready for production, use the build tool at http://modernizr.com to pick only the tests you need.
        bundles.Add(new ScriptBundle("~/bundles/modernizr").Include(
                    "~/Scripts/modernizr-*"));

        bundles.Add(new ScriptBundle("~/bundles/bootstrap").Include(
                    "~/Scripts/bootstrap.js",
                    "~/Scripts/respond.js"));

        bundles.Add(new ScriptBundle("~/bundles/jqwidgets").Include(
            "~/Scripts/jqxcore.js",
            "~/Scripts/jqxdata.js",
            "~/Scripts/jqxgrid.js",
            "~/Scripts/jqxgrid.selection.js",
            "~/Scripts/jqxgrid.pager.js",
            "~/Scripts/jqxlistbox.js",
            "~/Scripts/jqxbuttons.js",
            "~/Scripts/jqxscrollbar.js",
            "~/Scripts/jqxdatatable.js",
            "~/Scripts/jqxtreegrid.js",
            "~/Scripts/jqxmenu.js",
            "~/Scripts/jqxcalendar.js",
            "~/Scripts/jqxgrid.sort.js",
            "~/Scripts/jqxgrid.filter.js",
            "~/Scripts/jqxdatetimeinput.js",
            "~/Scripts/jqxdropdownlist.js",
            "~/Scripts/jqxslider.js",
            "~/Scripts/jqxeditor.js",
            "~/Scripts/jqxinput.js",
            "~/Scripts/jqxdraw.js",
            "~/Scripts/jqxchart.core.js",
            "~/Scripts/jqxchart.rangeselector.js",
            "~/Scripts/jqxtree.js",
            "~/Scripts/globalize.js",
            "~/Scripts/jqxbulletchart.js",
            "~/Scripts/jqxcheckbox.js",
            "~/Scripts/jqxradiobutton.js",
            "~/Scripts/jqxvalidator.js",
            "~/Scripts/jqxpanel.js",
            "~/Scripts/jqxpasswordinput.js",
            "~/Scripts/jqxnumberinput.js",
            "~/Scripts/jqxcombobox.js"
            ));

        bundles.Add(new StyleBundle("~/Content/css").Include(
            "~/Content/jqx.base.css",
            "~/Content/jqx.arctic.css",
            "~/Content/jqx.black.css",
            "~/Content/jqx.bootstrap.css",
            "~/Content/jqx.classic.css",
            "~/Content/jqx.darkblue.css",
            "~/Content/jqx.energyblue.css",
            "~/Content/jqx.fresh.css",
            "~/Content/jqx.highcontrast.css",
            "~/Content/jqx.metro.css",
            "~/Content/jqx.metrodark.css",
            "~/Content/jqx.office.css",
            "~/Content/jqx.orange.css",
            "~/Content/jqx.shinyblack.css",
            "~/Content/jqx.summer.css",
            "~/Content/jqx.web.css",
            "~/Content/jqx.ui-darkness.css",
            "~/Content/jqx.ui-lightness.css",
            "~/Content/jqx.ui-le-frog.css",
            "~/Content/jqx.ui-overcast.css",
            "~/Content/jqx.ui-redmond.css",
            "~/Content/jqx.ui-smoothness.css",
            "~/Content/jqx.ui-start.css",
            "~/Content/jqx.ui-sunny.css",
            "~/Content/bootstrap.css",
            "~/Content/site.css"
            ));
    }
}
Open the Views/Shared/_Layout.cshtml file and update it to include the jqwidgets scripts.
<!DOCTYPE html>
<html>
<head>
    <meta charset="utf-8" />
    <meta name="viewport" content="width=device-width, initial-scale=1.0">
    <title>@ViewBag.Title - ASP.NET MVC Application</title>
    @Styles.Render("~/Content/css")
    @Scripts.Render("~/bundles/modernizr")
	<script type="text/javascript">
	    window.onload = function () {
	        document.getElementById('bodyContainer').style.visibility = 'visible';
	    }
	</script>
</head>
<body>
    <div id='bodyContainer' style='visibility: hidden;' class="container body-content">
         @RenderBody()
    </div>

    @Scripts.Render("~/bundles/jquery")
    @Scripts.Render("~/bundles/bootstrap")
    @Scripts.Render("~/bundles/jqwidgets")
    @RenderSection("scripts", required: false)
</body>
</html>
Set up the database
To mimic the environment of having an existing database, we will first create a database with some pre-filled data, and then we will connect to the database. For our purposes, we will use LocalDB. You can use an existing database server instead of LocalDB, but depending on your version of Visual Studio and your type of database, all of the data tools in Visual Studio might not be supported. If the tools are not available for your database, you may need to perform some of the database-specific steps within the management suite for your database.
Launch Visual Studio and open the
Server Explorer pane. To add a new database, right-click
Data Connections and select
Add Connection.

If this is the first data connection you have added, you will be prompted to choose a Data source. Select Microsoft SQL Server. If you have added a data connection in the past, you might not see this dialog window.

If you have a server that you prefer to use, you can specify the name of that server; otherwise, use the local database that comes with Visual Studio by specifying (localdb)\v11.0 for the server name. Name the database.
The sample database which we use in our samples is called ‘EmployeeDB’.
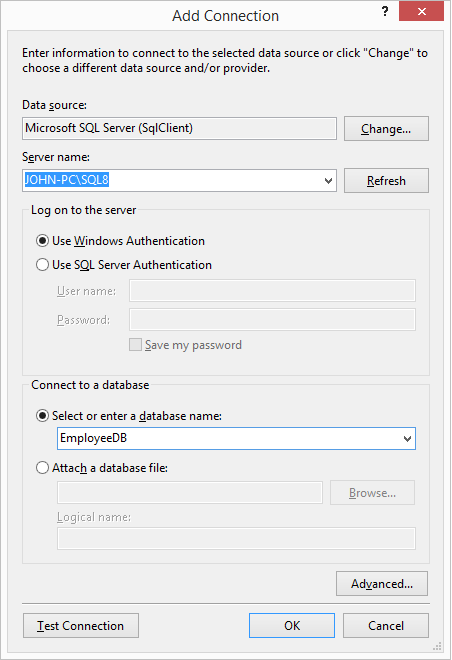
Click
OK. When prompted to create a new database, select
Yes.

Your new database appears in the
Server Explorer pane, under the
Data Connections node. The database name may be prefixed with some additional identifiers. Right-click the database, and select
New Query.
In the
query window, you will add SQL commands to create a Table and add some example data to it.
Open the query editor and execute the following to scripts in order:
- EmployeeTable_Schema.sql
- EmployeeTable_Data.sql
These scripts are located in the
jqwidgets/demos/aspnetmvc/DatabaseSetup folder.
Or you can copy the commands from below:
CREATE TABLE [dbo].[Employee] (
    [EmployeeID]      INT           IDENTITY (1, 1) NOT NULL,
    [ManagerID]      INT NULL,
    [FirstName]      NVARCHAR (50) NULL,
    [LastName]       NVARCHAR (50) NULL,
    [Title]       NVARCHAR (50) NULL,
    [Country]       NVARCHAR (50) NULL,
    [City]       NVARCHAR (50) NULL,
    [Address]       NVARCHAR (50) NULL,
    [HireDate]       DATETIME NULL,
    [BirthDate]       DATETIME NULL,
    PRIMARY KEY CLUSTERED ([EmployeeID] ASC)
);

SET IDENTITY_INSERT [dbo].[Employee] ON
INSERT INTO [dbo].[Employee] ([EmployeeID], [ManagerID], [FirstName], [LastName], [Title], [Country], [City], [Address], [HireDate], [BirthDate]) VALUES (1, 2, N'Nancy', N'Davolio', N'Sales Representative', N'USA', N'Seattle', N'507 - 20th Ave. E.Apt. 2A', N'1992-05-01 00:00:00', N'1948-12-08 00:00:00')
INSERT INTO [dbo].[Employee] ([EmployeeID], [ManagerID], [FirstName], [LastName], [Title], [Country], [City], [Address], [HireDate], [BirthDate]) VALUES (2, NULL, N'Andrew', N'Fuller', N'Vice President', N'USA', N'Tahoma', N'908 W. Capital Way', N'1992-08-14 00:00:00', N'1952-02-19 00:00:00')
INSERT INTO [dbo].[Employee] ([EmployeeID], [ManagerID], [FirstName], [LastName], [Title], [Country], [City], [Address], [HireDate], [BirthDate]) VALUES (3, 2, N'Janet', N'Leverling', N'Sales Representative', N'USA', N'Kirkland', N'722 Moss Bay Blvd.', N'1992-04-01 00:00:00', N'1963-08-30 00:00:00')
INSERT INTO [dbo].[Employee] ([EmployeeID], [ManagerID], [FirstName], [LastName], [Title], [Country], [City], [Address], [HireDate], [BirthDate]) VALUES (4, 2, N'Margaret', N'Peacock', N'Sales Representative', N'USA', N'Redmond', N'4110 Old Redmond Rd.', N'1993-05-03 00:00:00', N'1937-09-19 00:00:00')
INSERT INTO [dbo].[Employee] ([EmployeeID], [ManagerID], [FirstName], [LastName], [Title], [Country], [City], [Address], [HireDate], [BirthDate]) VALUES (5, 2, N'Steven', N'Buchanan', N'Sales Manager', N'UK', N'London', N'14 Garrett Hill', N'1993-10-17 00:00:00', N'1955-03-04 00:00:00')
INSERT INTO [dbo].[Employee] ([EmployeeID], [ManagerID], [FirstName], [LastName], [Title], [Country], [City], [Address], [HireDate], [BirthDate]) VALUES (6, 5, N'Michael', N'Suyama', N'Sales Representative', N'UK', N'London', N'Coventry House Miner Rd.', N'1993-10-17 00:00:00', N'1963-07-02 00:00:00')
INSERT INTO [dbo].[Employee] ([EmployeeID], [ManagerID], [FirstName], [LastName], [Title], [Country], [City], [Address], [HireDate], [BirthDate]) VALUES (7, 5, N'Robert', N'King', N'Sales Representative', N'UK', N'London', N'Edgeham Hollow Winchester Way', N'1994-01-02 00:00:00', N'1960-05-29 00:00:00')
INSERT INTO [dbo].[Employee] ([EmployeeID], [ManagerID], [FirstName], [LastName], [Title], [Country], [City], [Address], [HireDate], [BirthDate]) VALUES (8, 2, N'Laura', N'Callahan', N'Inside Sales Coordinator', N'USA', N'Seattle', N'4726 - 11th Ave. N.E.', N'1994-03-05 00:00:00', N'1958-01-09 00:00:00')
INSERT INTO [dbo].[Employee] ([EmployeeID], [ManagerID], [FirstName], [LastName], [Title], [Country], [City], [Address], [HireDate], [BirthDate]) VALUES (9, 5, N'Anne', N'Dodsworth', N'Sales Representative', N'UK', N'London', N'7 Houndstooth Rd.', N'1994-11-15 00:00:00', N'1966-01-27 00:00:00')
SET IDENTITY_INSERT [dbo].[Employee] OFF
Execute the query (Ctrl + Shift + E). The table now exist in the database.
Generate the Model
You will now create Entity Framework model from the database table. This model represents a class that you will use to work with the data. The model mirrors a table in the database and contains properties that correspond to the columns in the table.
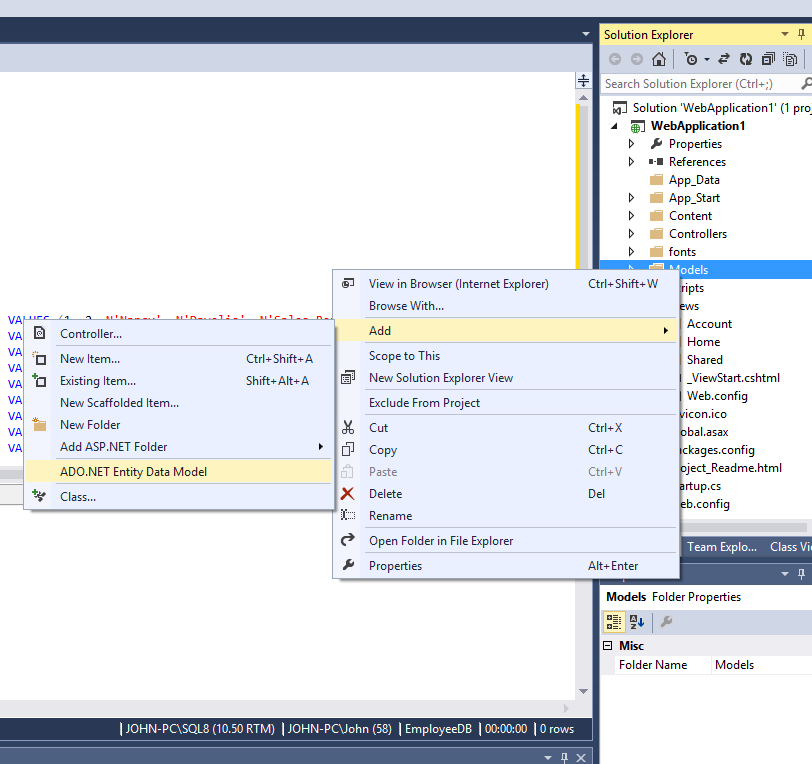
Right-click the
Models folder, and select
Add and
ADO .NET Entity Data Model.
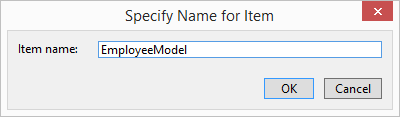
Set the Model's name to "EmployeeModel" and click
OK.
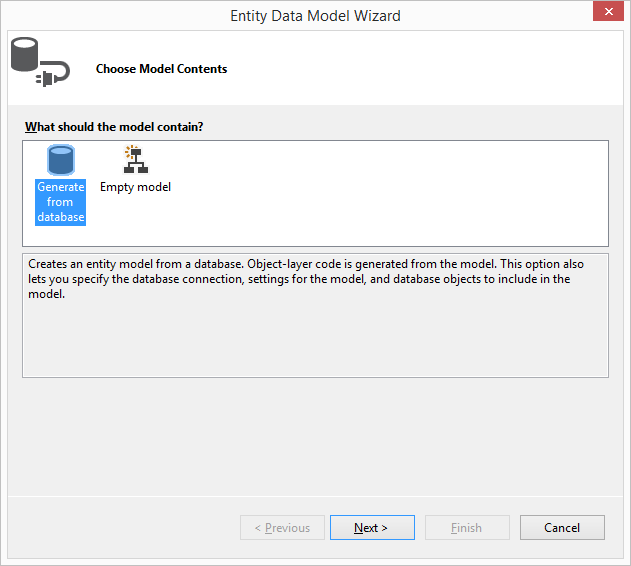
Select
Generate from Database and click
Next.
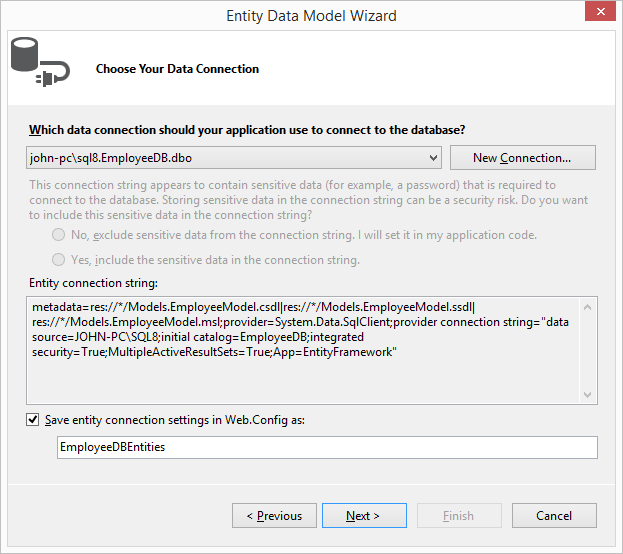
Click
Next again on the next dialog.
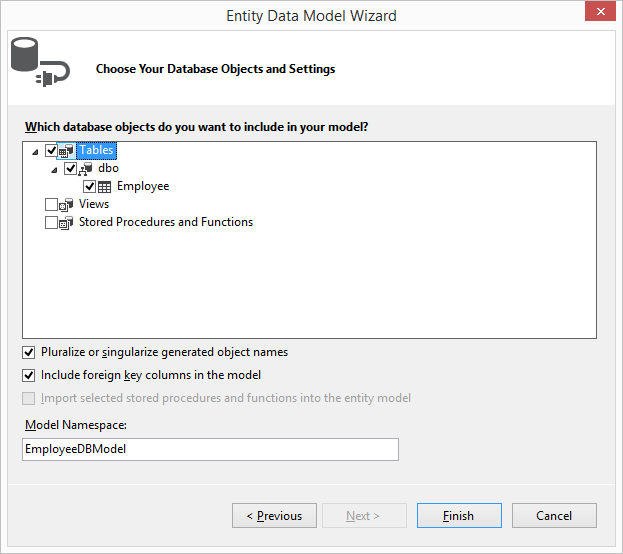
Select the
Employee table and click
Finish.
Before adding the controller, Rebuild your project.
Generate the Controller
MVC controllers are responsible for responding to requests made against an ASP.NET MVC website. Each browser request is mapped to a particular controller. For example, imagine that you enter the following URL into the address bar of your browser:
localhost/Product/Index/3
In this case, a controller named ProductController is invoked. The ProductController is responsible for generating the response to the browser request. For example, the controller might return a particular view back to the browser or the controller might redirect the user to another controller.
Right-click the
Controller folder, and select
Add and
Controller. Then select
MVC5 Controller with views, using Entity Framework

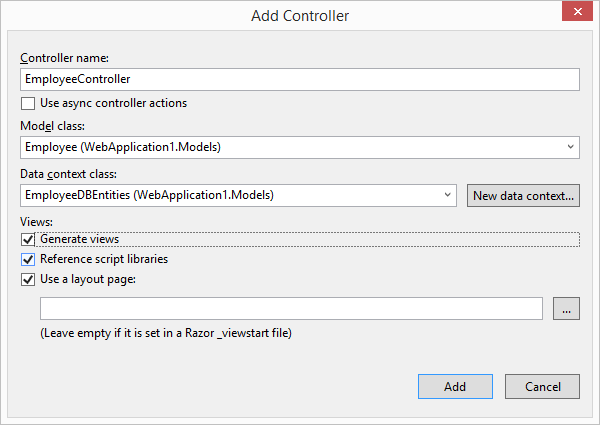
In the
Add Controller dialog, set the Controller's name to
EmployeeController and set the Model and Data context classes to match to your Model.
If you would like to see the default generated web page, click
F5 and navigate to localhost:4464/Employee. The port number on your side would be different.
Now open EmployeeController.cs and add the following method which returns the Employees as JSON:
public JsonResult GetEmployees()
{
    var dbResult = db.Employees.ToList();
    var employees = (from employee in dbResult
                        select new
                        {
                            employee.FirstName,
                            employee.LastName,
                            employee.EmployeeID,
                            employee.BirthDate,
                            employee.HireDate,
                            employee.ManagerID,
                            employee.Title,
                            employee.City,
                            employee.Country,
                            employee.Address
                        });
    return Json(employees, JsonRequestBehavior.AllowGet);
}
Generate the View
Expand the
Views folder in the
Solution Explorer pane and then expand the
Employee folder. Remove all generated files expect
Index.cshtml.
Open
Index.cshtml and replace its code with the code below:
@{
    ViewBag.Title = "jQWidgets DataTable";
}
@section scripts {
    <script type="text/javascript">
        $(document).ready(function () {
            // prepare the data
            var source =
            {
                dataType: "json",
                dataFields: [
                    { name: 'EmployeeID', type: 'number' },
                    { name: 'ManagerID', type: 'number' },
                    { name: 'FirstName', type: 'string' },
                    { name: 'LastName', type: 'string' },
                    { name: 'Country', type: 'string' },
                    { name: 'City', type: 'string' },
                    { name: 'Address', type: 'string' },
                    { name: 'Title', type: 'string' },
                    { name: 'HireDate', type: 'date' },
                    { name: 'BirthDate', type: 'date' }
                ],
                id: 'EmployeeID',
                url: '/Employee/GetEmployees'
            };
            var dataAdapter = new $.jqx.dataAdapter(source);
            // create Tree Grid
            $("#dataTable").jqxDataTable(
            {
                width: 850,
                source: dataAdapter,
                theme: 'arctic',
                pageSize: 5,
                sortable: true,
                filterable: true,
                pageable: true,
                columns: [
                  { text: 'FirstName', dataField: 'FirstName', width: 200 },
                  { text: 'LastName', dataField: 'LastName', width: 200 },
                  { text: 'Title', dataField: 'Title', width: 160 },
                  { text: 'Birth Date', dataField: 'BirthDate', cellsFormat: 'd', width: 120 },
                  { text: 'Hire Date', dataField: 'HireDate', cellsFormat: 'd', width: 120 },
                  { text: 'Address', dataField: 'Address', width: 250 },
                  { text: 'City', dataField: 'City', width: 120 },
                  { text: 'Country', dataField: 'Country' }
                ]
            });
        });
    </script>
}
<div id="dataTable"></div>
Result after running the application - localhost:4464/Employee
Please, note that when you run the application, you will see a different port number.
